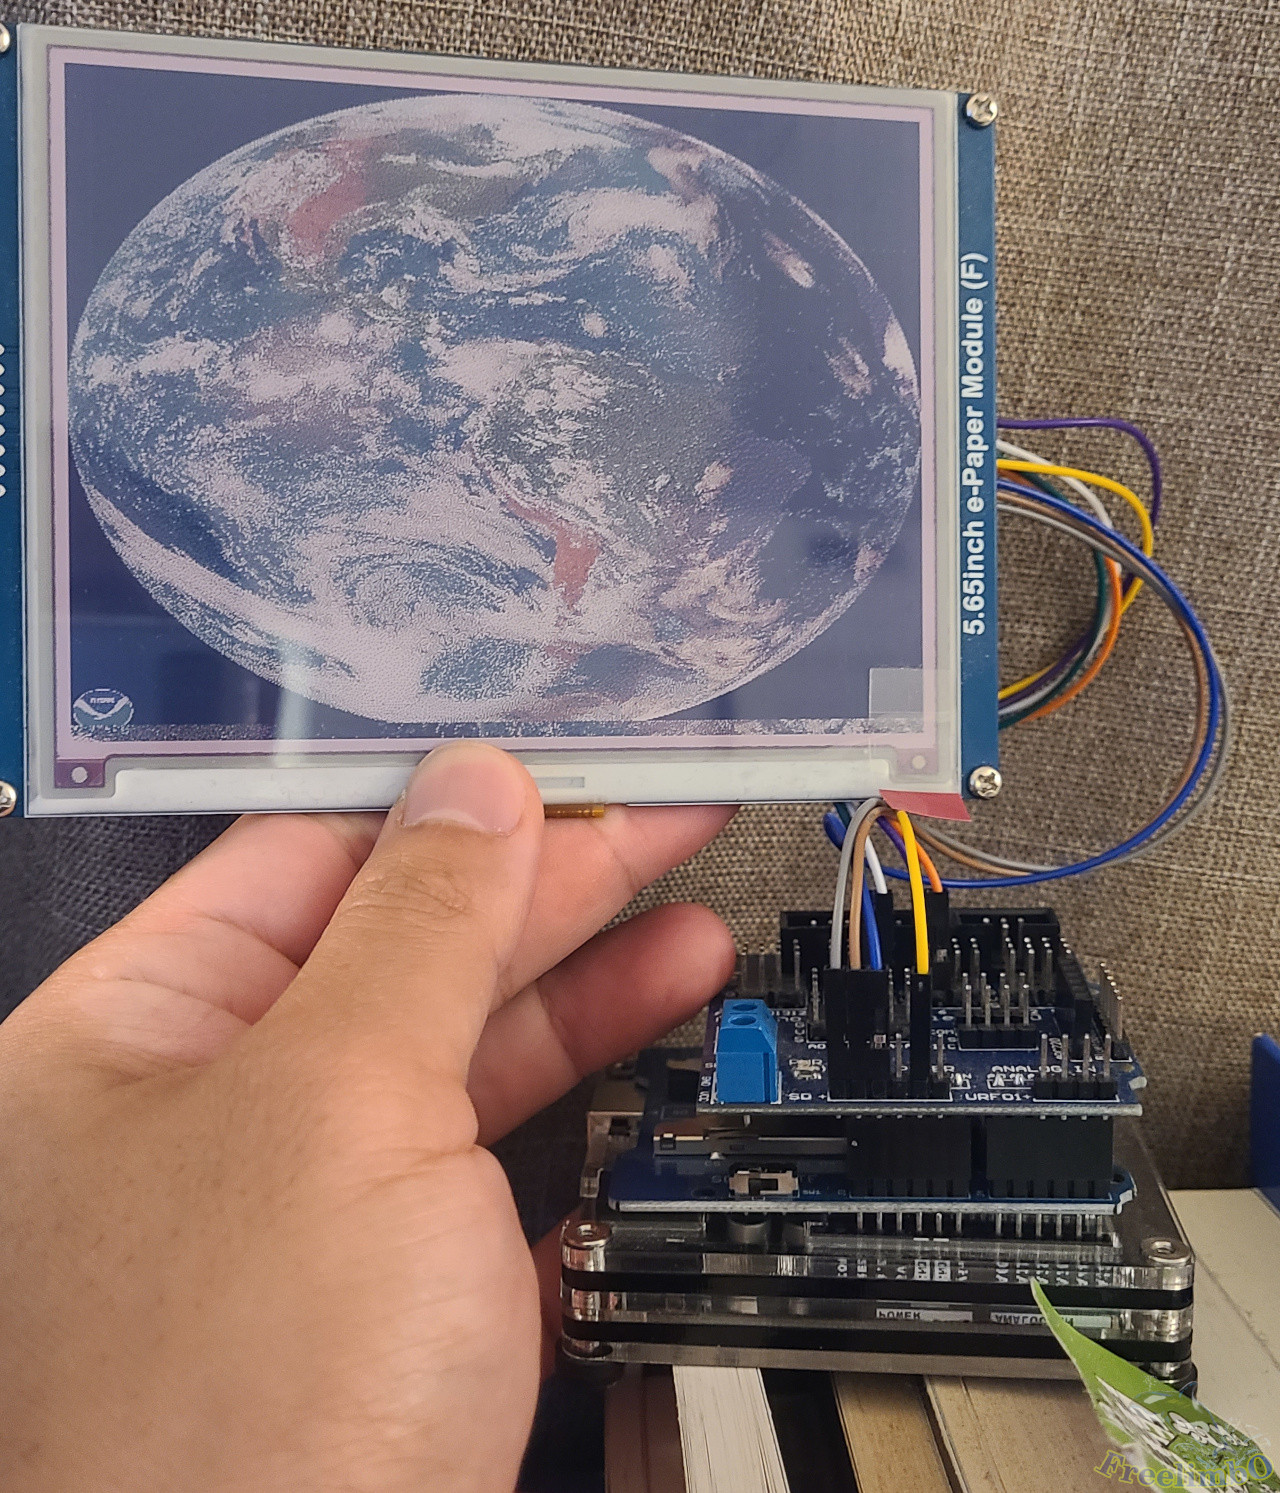
Devices: Arduino UNO R3, Waveshare e-Paper 5in65f, and HiLetgo SD & TF Card Shield.
Reference:
- 5.65 inch 7 color photo frame: https://www.youtube.com/watch?v=YawP9RjPcJA&t=153s
- Hardware wiring: https://github.com/robertmoro/7ColorEPaperPhotoFrame/tree/main
- Convert JPG to 7 color matrix: https://gist.github.com/joeycastillo/317816ad36491a2a79389d97b53f5b3e
I was planning to make an e-paper photo frame because my daughter used to look at our LCD photo frame for a long period of time. Luckily, I found some posts and videos online using e-paper displays and microcontrollers to build amazing frames. As mentioned in the BOM of the 2nd reference post, I got an SD card shield and a 5.65 inch 7-color e-paper display.
1. Problems
I thought the coding part should be a piece of cake for me since I had built an LCD photo frame before. However, there were still two issues that stopped me from succeeding.
1.a Color Quantization
The first hard part was how to prepare the 7-color images. Last time, I converted photos to bitmap images, and my Arduino code only needed to load pixels and then convert RGB to 565 format. But e-paper only had 7 colors to represent pictures, which would rely on the same color mixing theory of Pointillism. Then how could I convert the original photos to pointillistic photos?
1.b Storage or Stream
The other one was where to store the photos. My previous build used an LCD, which came with a micro-SD card reader, but this time the e-paper display did not have a built-in card reader. I considered using Bluetooth modules or Wi-Fi modules to transfer photos from a computer to my Arduino, but that would require a computer taking the role of a server, which was cool but kind of complex to me given that I need to take care of my kid now.
2. Solutions
2.a Color Quantization
The first problem was resolved by the 3rd reference post on GitHub. Converting images with a customized palette and PIL library saved my life. The 2nd post used GIMP’s indexing and ditching to achieve the same color quantization. Both of them saved the converted photos as BMP files, but I actually not a big fan of BMP. I knew Arduino could read bytes directly from binary files, so this time I decided to store my photos in uint8_t binaries. The official Arduino code from Waveshare mentioned the format of input pixels must be combined. More specifically, two 3-bit pixels in one byte. Therefore, I combined in the Python preparation code. Here is my combining code for your reference.
def combine2pixels(my_img):
    matrix=[]
    for r_idx in range(shape_6in65[1]):
        line = []
        for c_idx in range(int(shape_6in65[0]/2)):
            p1 = my_img.getpixel((c_idx*2, r_idx))
            p2 = my_img.getpixel((c_idx*2+1, r_idx))
            combined_p = (p1<<4)+p2
            line.append(combined_p)
        matrix += line
    return matrix
2.b Storage or Stream
Given the limited time for my personal project, I surrendered to the easy way, which was using a micro-SD card to store all quantized photos. I got an SD card reader shield from Amazon, and followed the description on its page to use SPI to control the reading of my photos.
Then there came my agony.
Both the e-paper display and my SD card reader used SPI connection, and the selection pins must be different on the Arduino. The SD card shield’s PCB had already hardwired pin D10 of Arduino to be its CS, and the e-paper’s CS could be anything of my choice. So I assigned D10 for the card reader and D6 for e-paper. Then lots of weird things happened. For example, two of my SD cards got ruined with unknown reasons. I cannot format to reuse them. I thought that was an aging issue of the two old SD cards, so I quickly purchased new cards. After I got the new SD cards, I soon ruined one of them. Holy! But the new card’s situation was even creepier. All photos got erased! I had to format the card and copy photos into it again and again. That was not sensible at all since I only read them from Arduino.
During the debugging, I found my Arduino out of control. The virtual COM port often stopped working. Even restarting my computer cannot resolve it. Only when I remove Arduino’s power and all SPI devices, I can re-install the latest firmware to my controller.
I put the project aside and spent more time with my beloved family. Tried to figure out which part went wrong. Haven’t I followed the datasheets correctly? The CS pins of SPI? The initialization of the e-paper? After countless trials and studies, I finally found the root cause.
The Amazon item page told me the wrong hardwired CS pin of the SD card shield. Dam…..
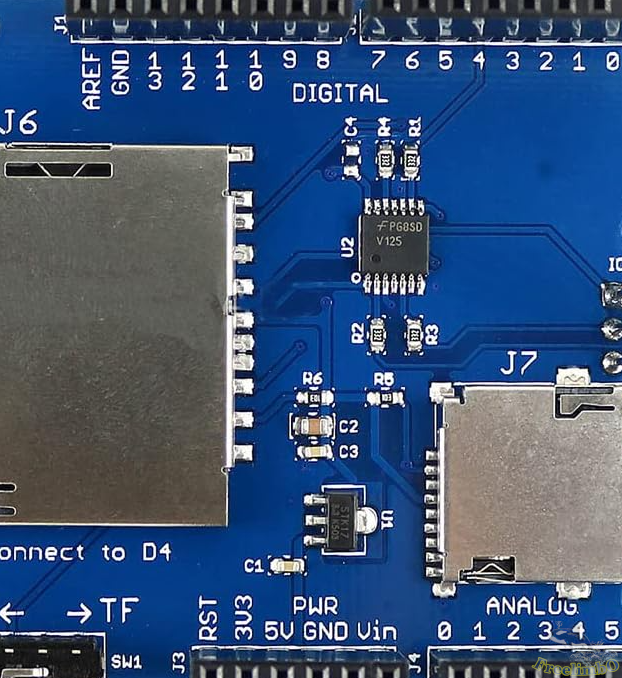 In the upper right corner, the only digital pin used was D4.
It was the wrong CS pin causing undefined behaviors in my system. OK, problem solved after assignning the correct pin in my Arduino code I got my photo frame worked at last.
 My e-paper photo frame.
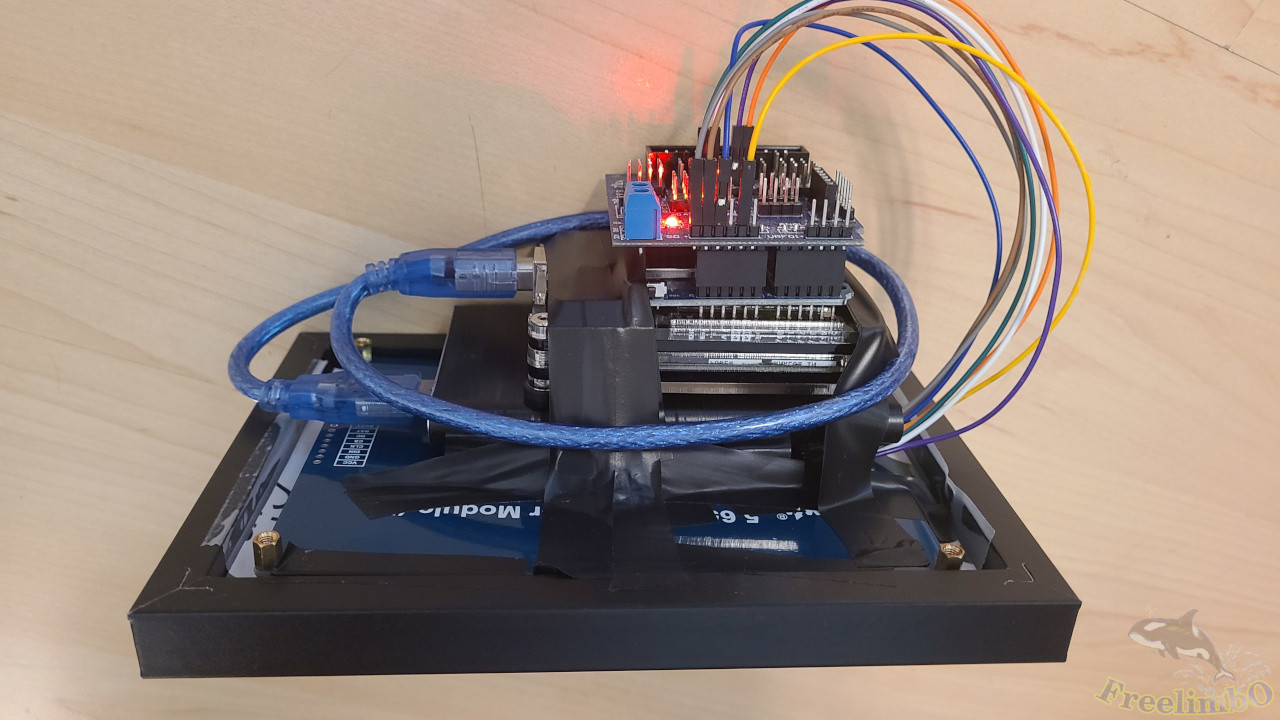 I felt so happy wrapping everything compactly.
I put some quantized inside the micro-SD and set a timer of 20 minutes to load the next photo.
 I am pretty happy with the low hue saturation because everything looked vintage in it.
It also reminded me of the old days of using low-dpi printers to print pictures. Hope my story can make you laugh or help you avoid the mistakes I made.