Materials: Lego bricks, cotton strings, and Strictly Briks Stackable Baseplates.
I saw some some advertisements of some toys seemed defying gravity. There were a couple of youtube videos crafting this kind of anti-gravity tables. I did some research online and found the correct name of this kind of structure should be tensegrity, which was composed of two words: tense and integrity because this kind of structure relied on strings' tense to stay as an integrity.
In this post, I would like to build my tensegrity table with LEGO bricks. My idea is very simple. I am going to build two mirrored structures and use some strings to connect them together.
 |
 |
|---|---|
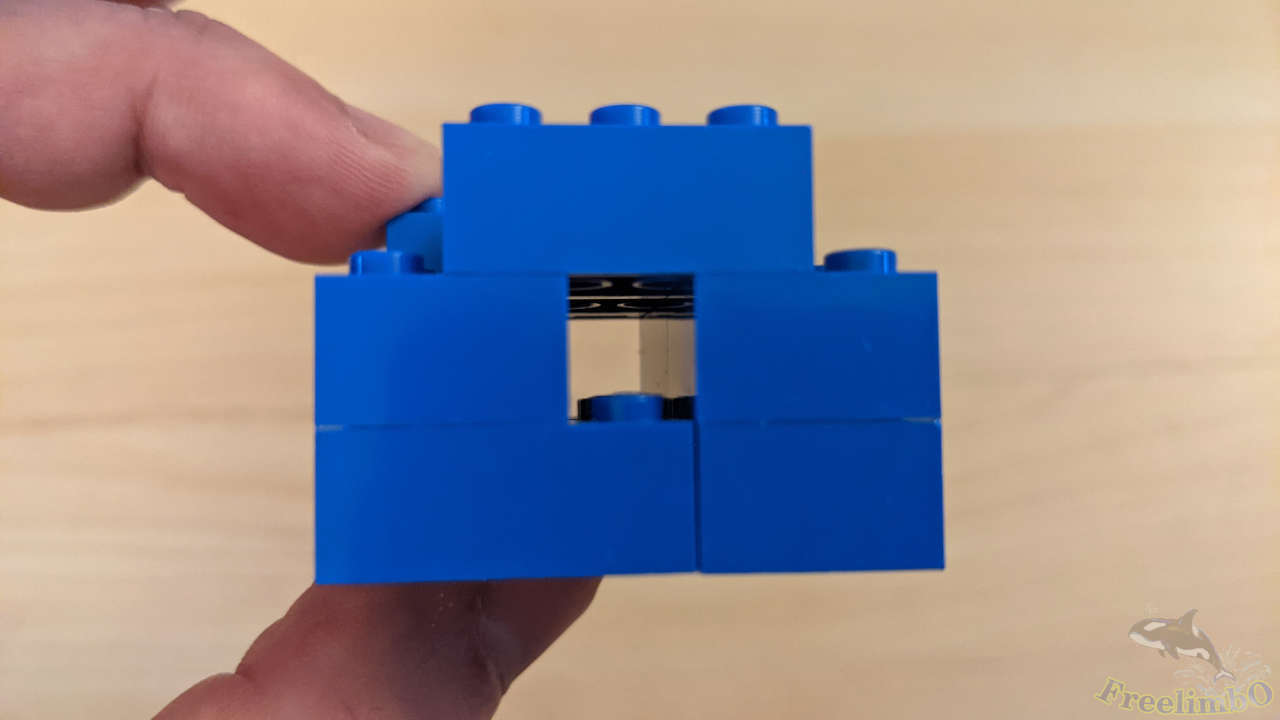
| A small structure with a through hold in the middle. | The top view shows there must be some 2x3 bricks to bridge the brick on both sides of the tunnel. |
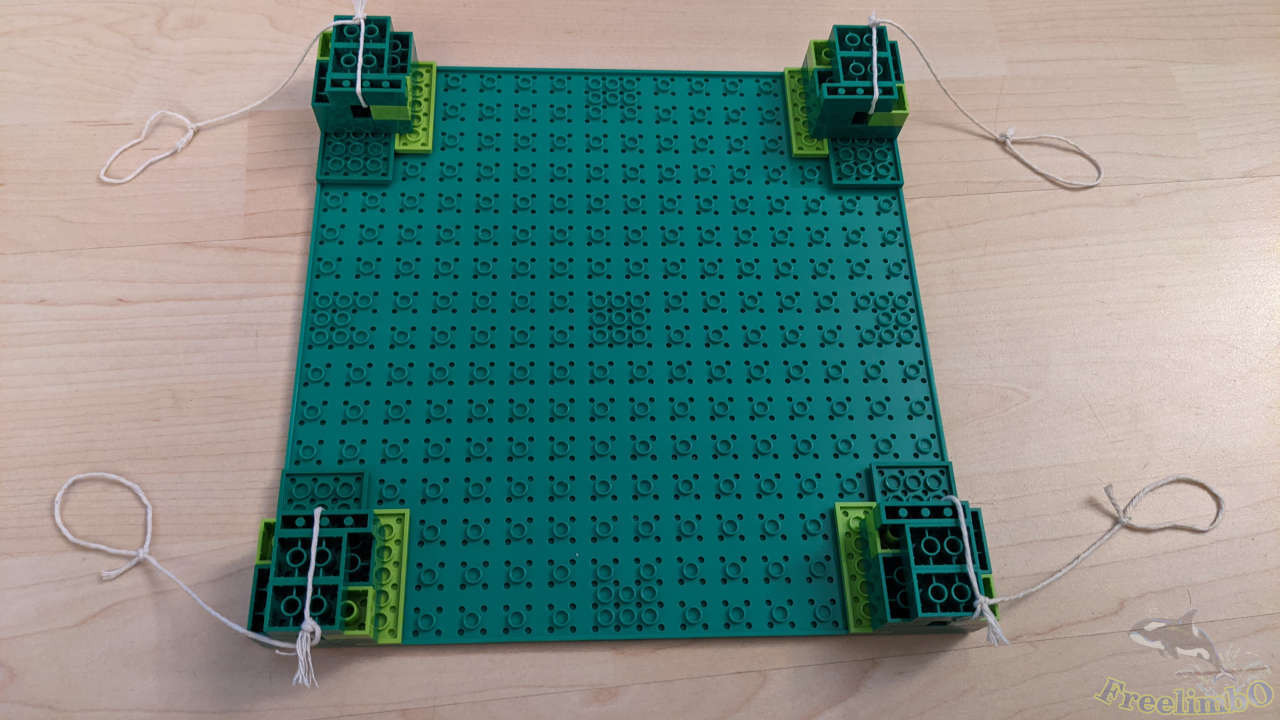
The first step is to build this module to serve as on anchor point of the strings.
The second step is to clone another three of this anchor points to be installed on a baseplate later.
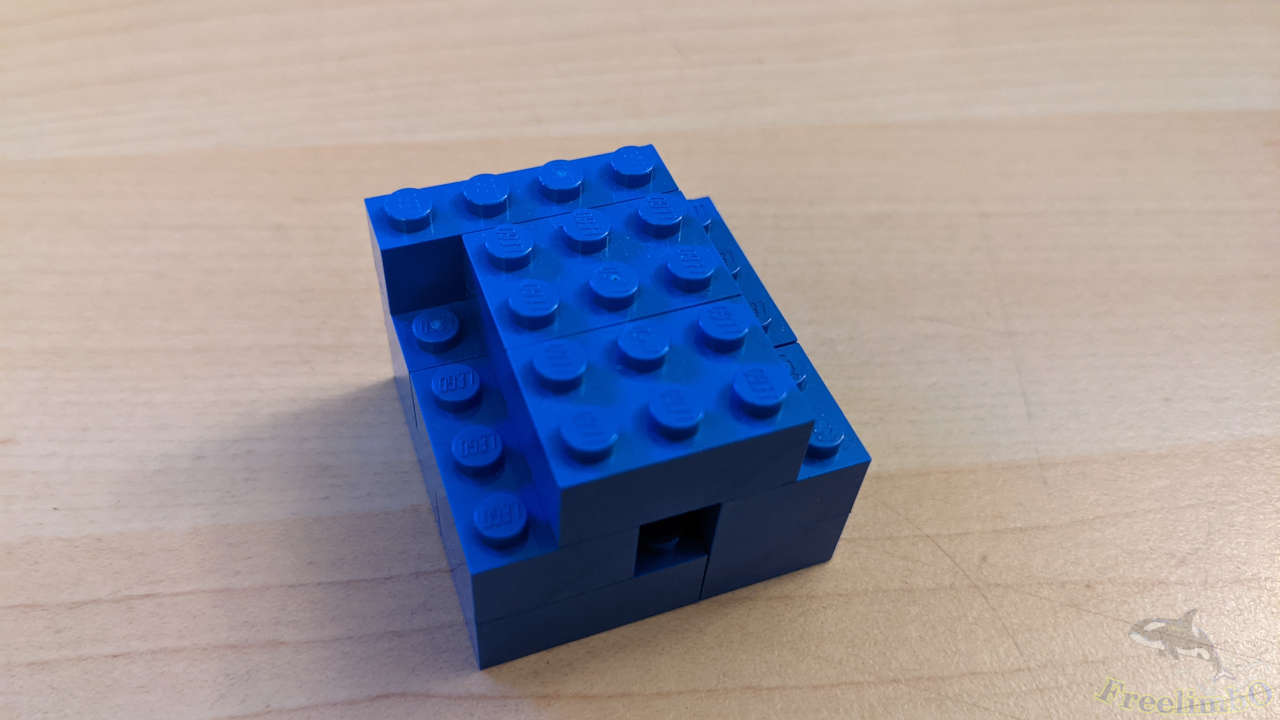
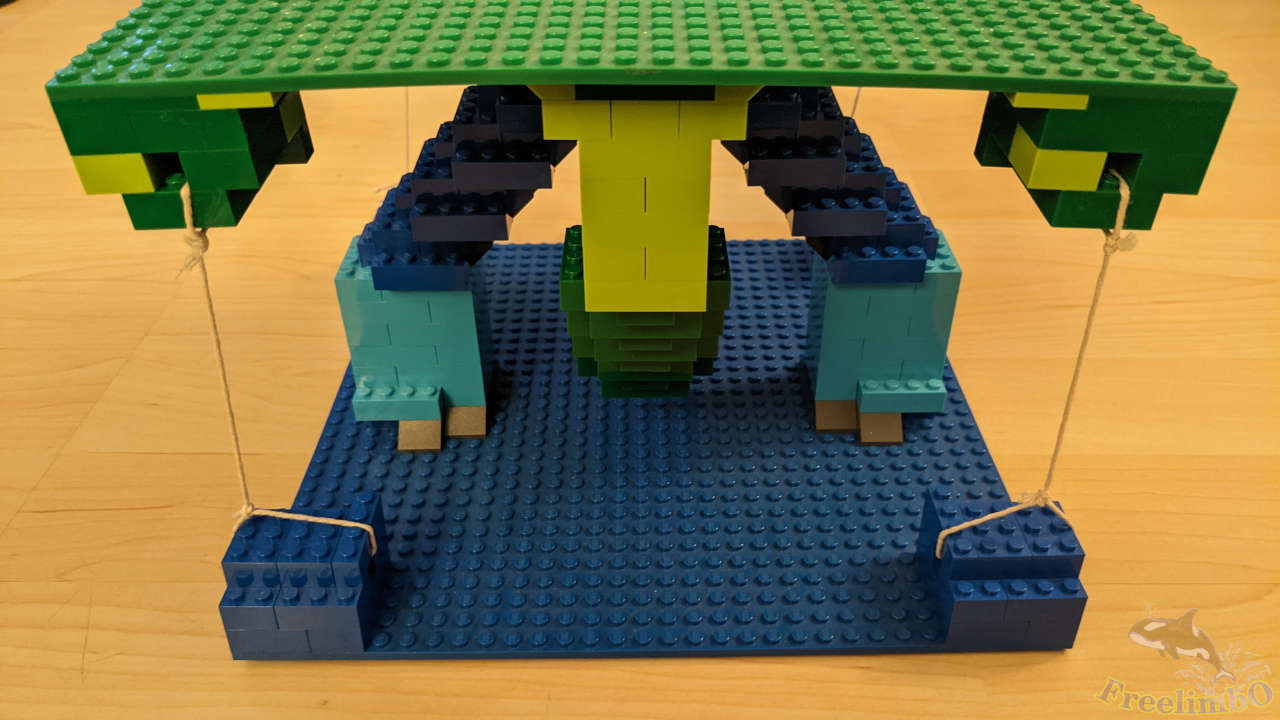
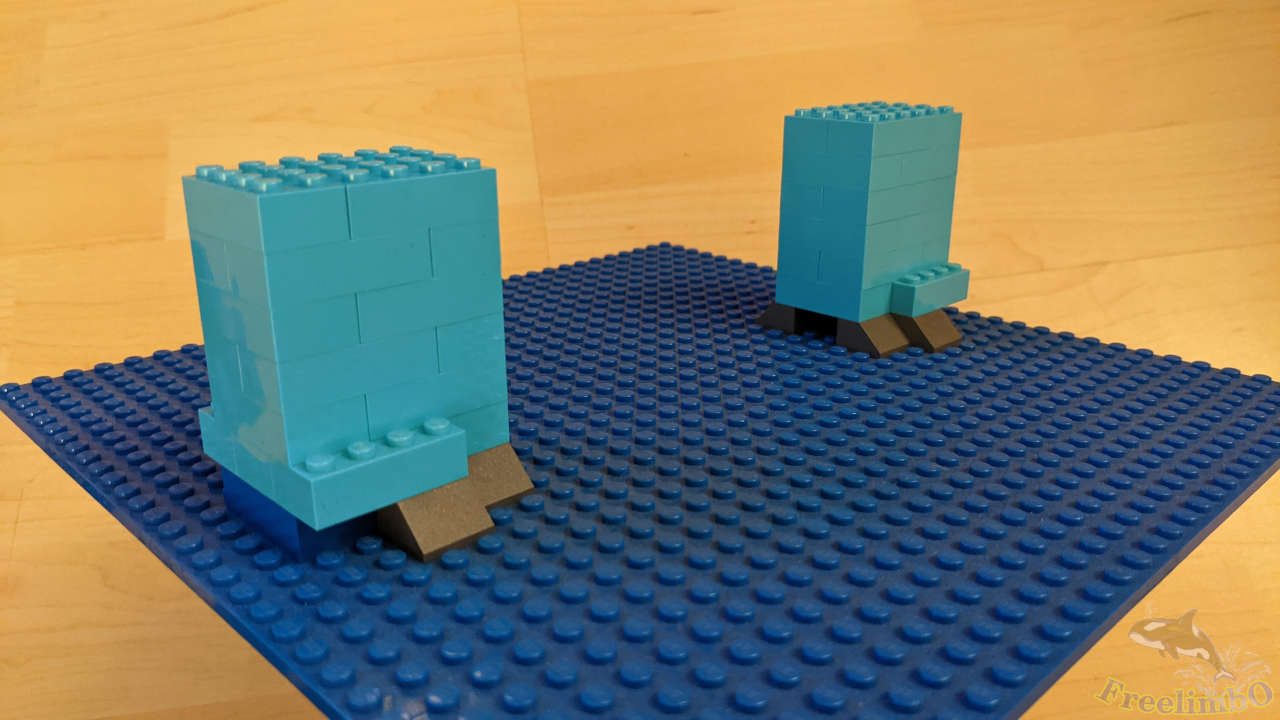 The third step is to build to sturdy pillars here I use some 2x4 bricks to build two 4x6 pillars. Ialso use some slides to distribute the force. These two pillars must be strong enough because they will be the only two structures to hold the weight of the table.
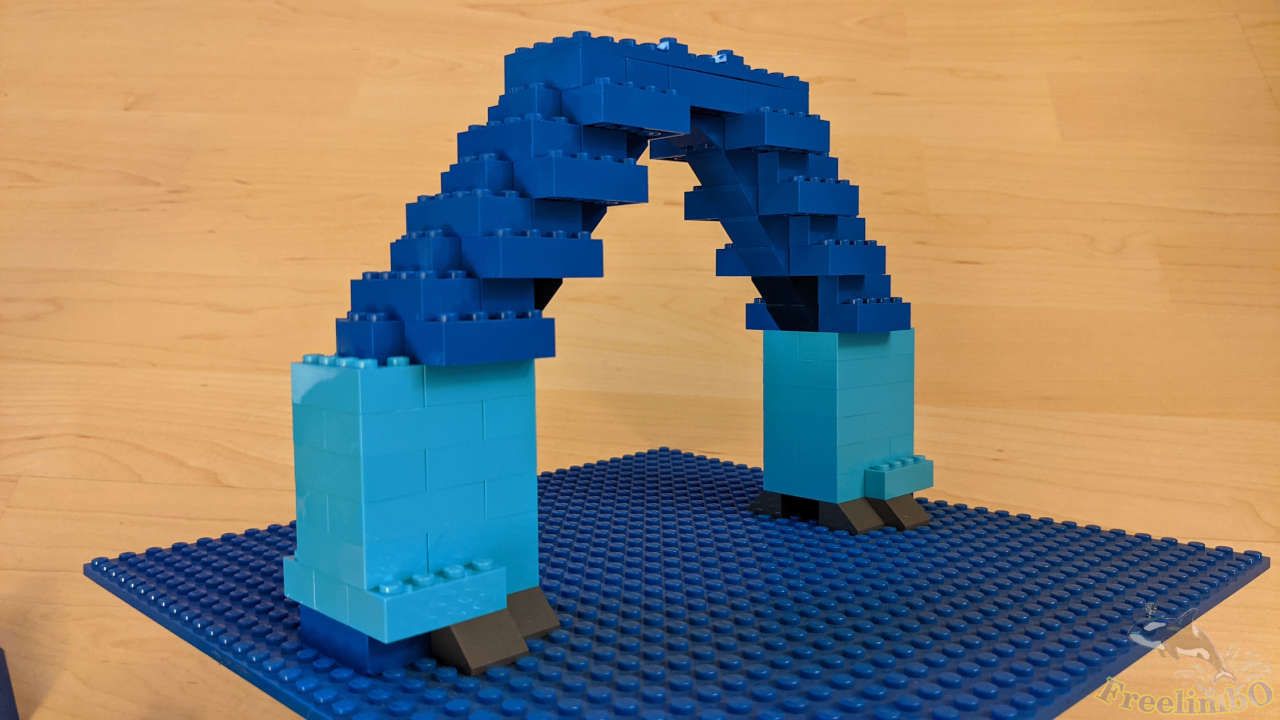 The fourth step is to build the arch on the pair of pillars. Please note that the arch has to be perfectly symmetric so the the gravity can be distribute evenly.
Since we are going to tie a string at the peak of the arch, I also use some slides to ensure that the thinnest part is in the middle.
 The fifth step is to build four anchor points on the back of another stackable in upside-down fashion. As you can see I already tie four strings on the anchor modules.
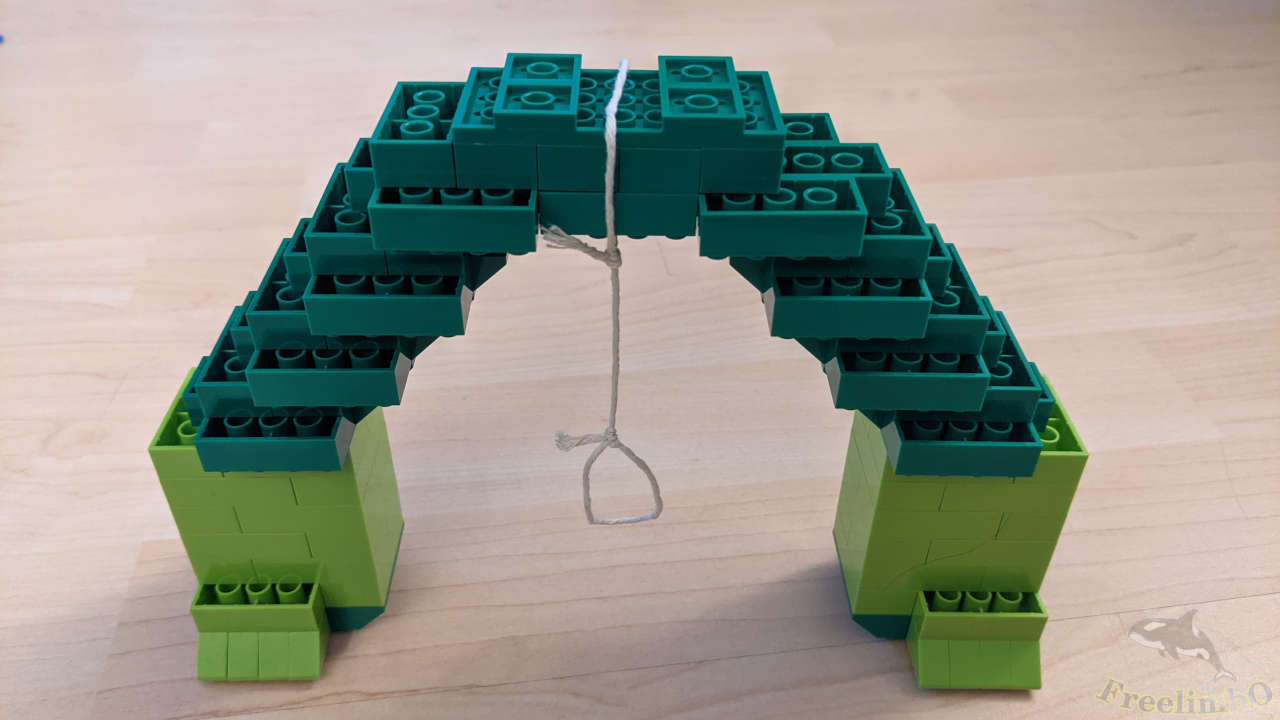 The sixth step is building an inverted arch with two strong pillars.
 And then install the pillars to the back of the baseplate.
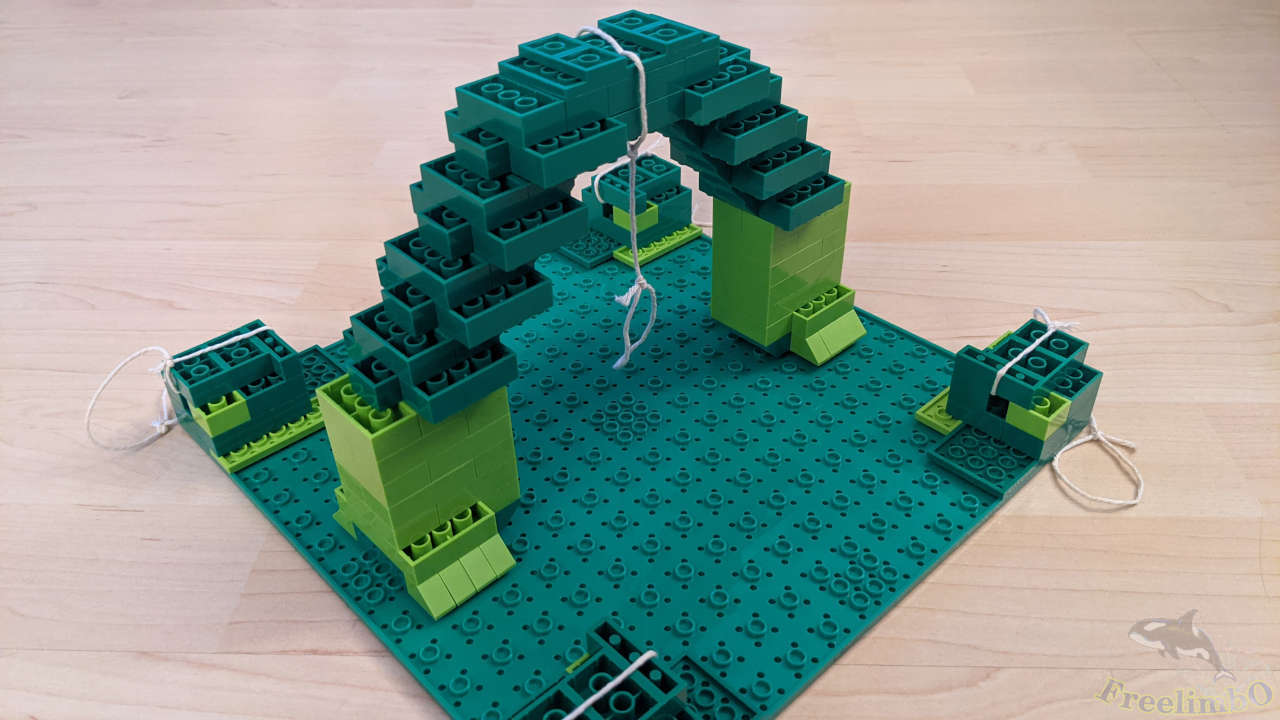
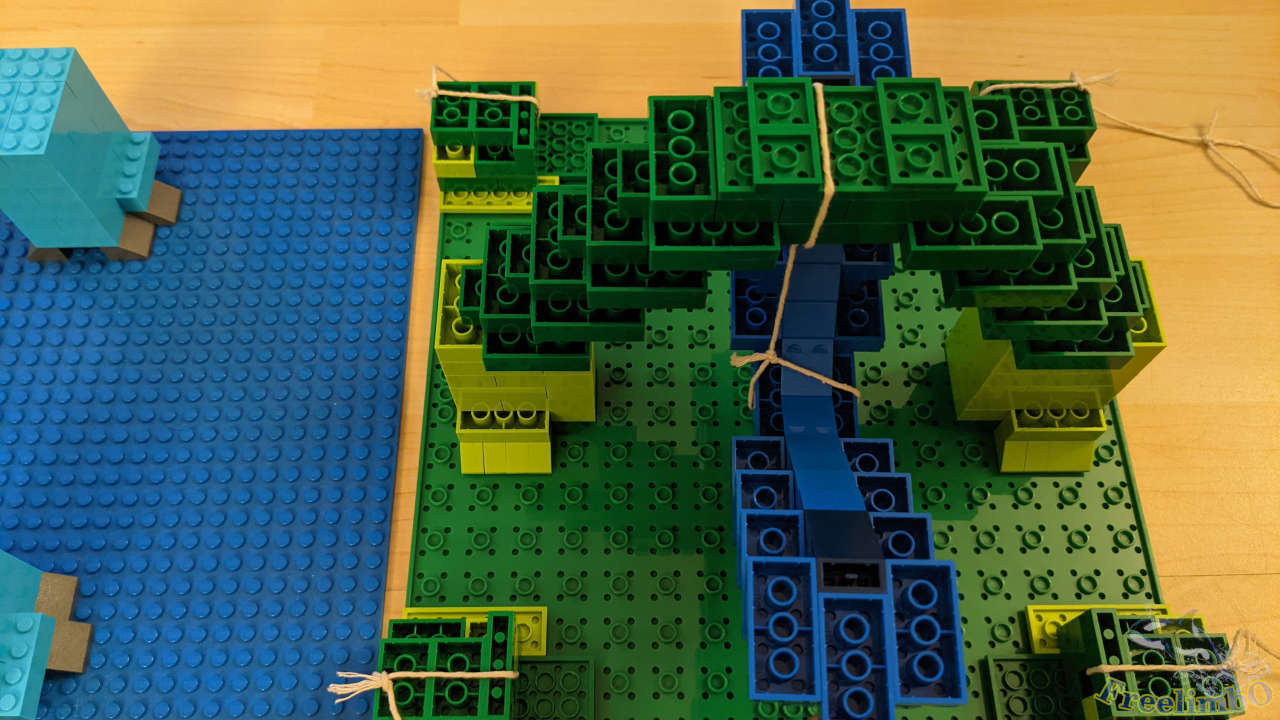 In the seventh step, I suspend the blue arch through the inverted arch. We can see the aforementioned slides that ensure the thinnest part of the blue arch in the middle.
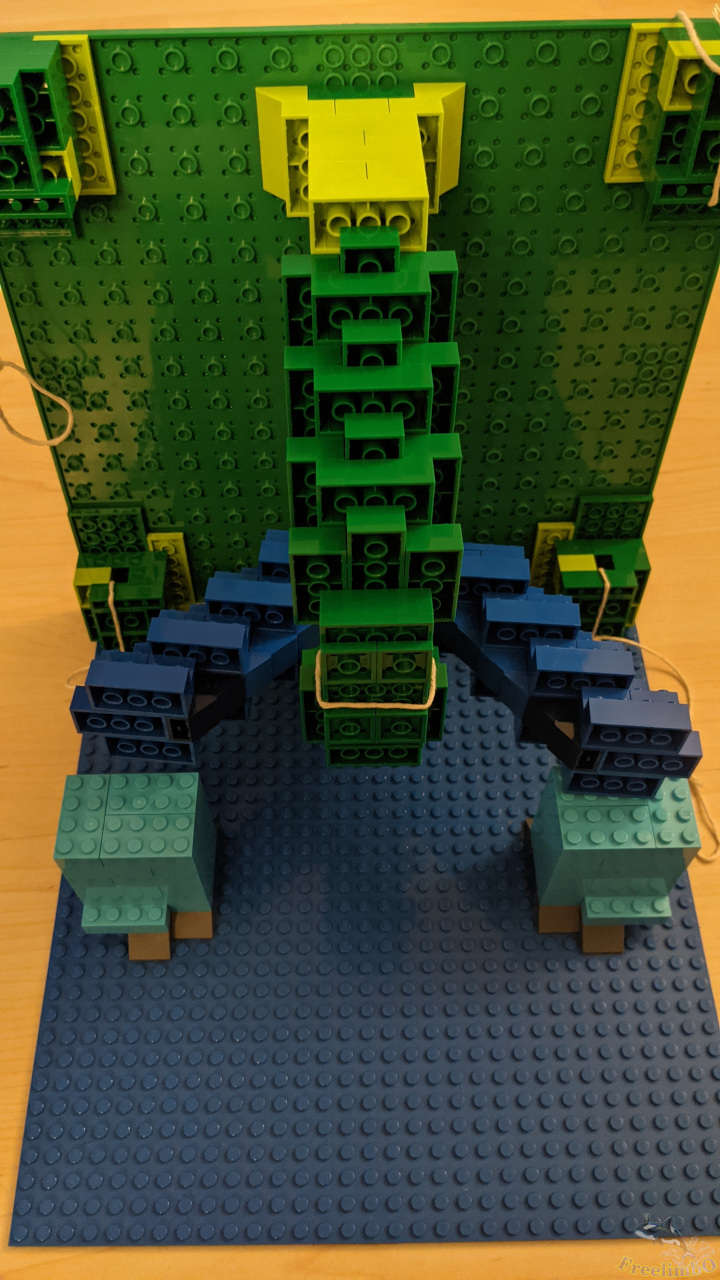 The eighth step is to carefully install the blue arch on its pillars.
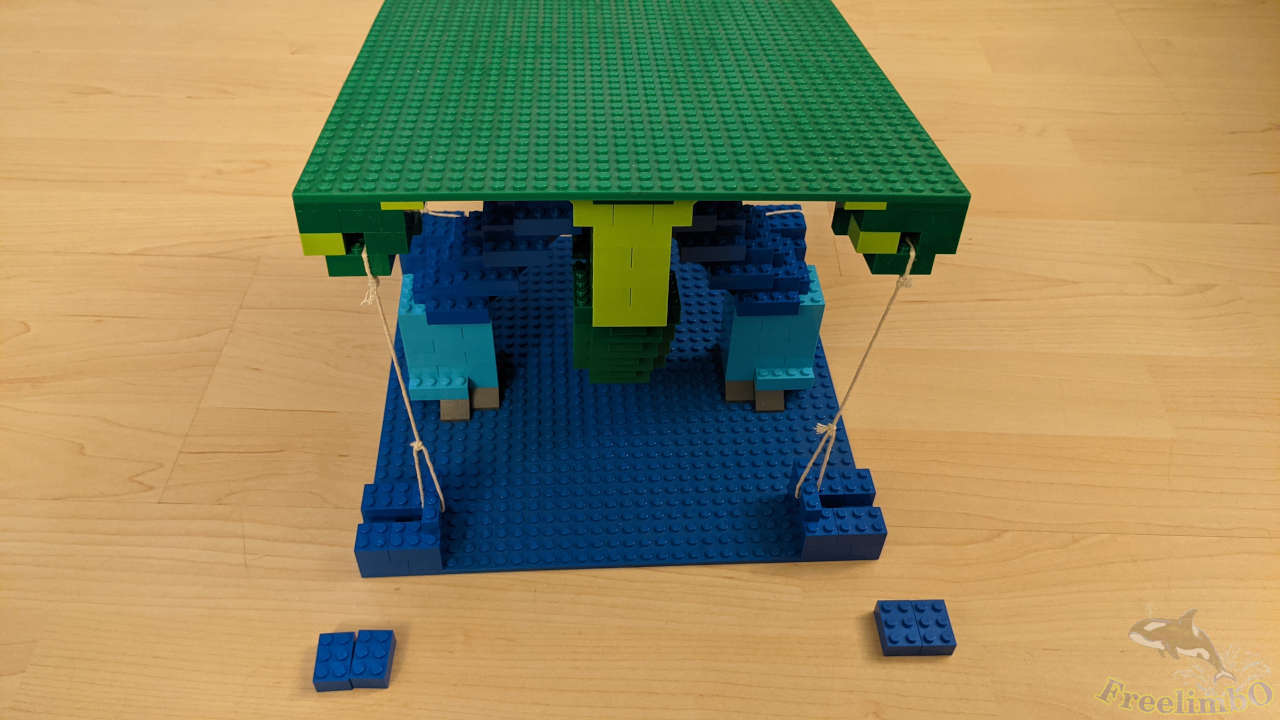
 The ninth step I start to connect the four strings from green anchor modules to blue anchor modules.
 |
 |
|---|---|
| Two done, and two more to go. | Almost done. |
 Once we finish the covers of the last two tunnels, the tensegrity table should start to float and balance by itself.
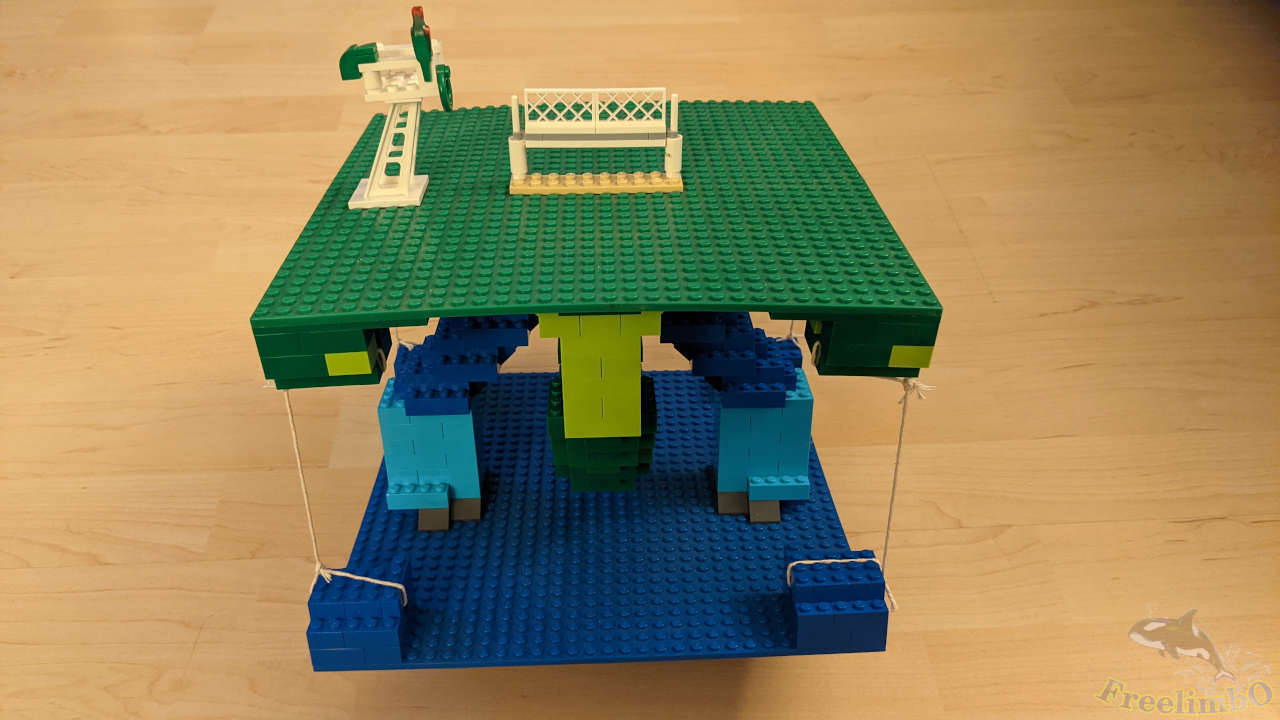
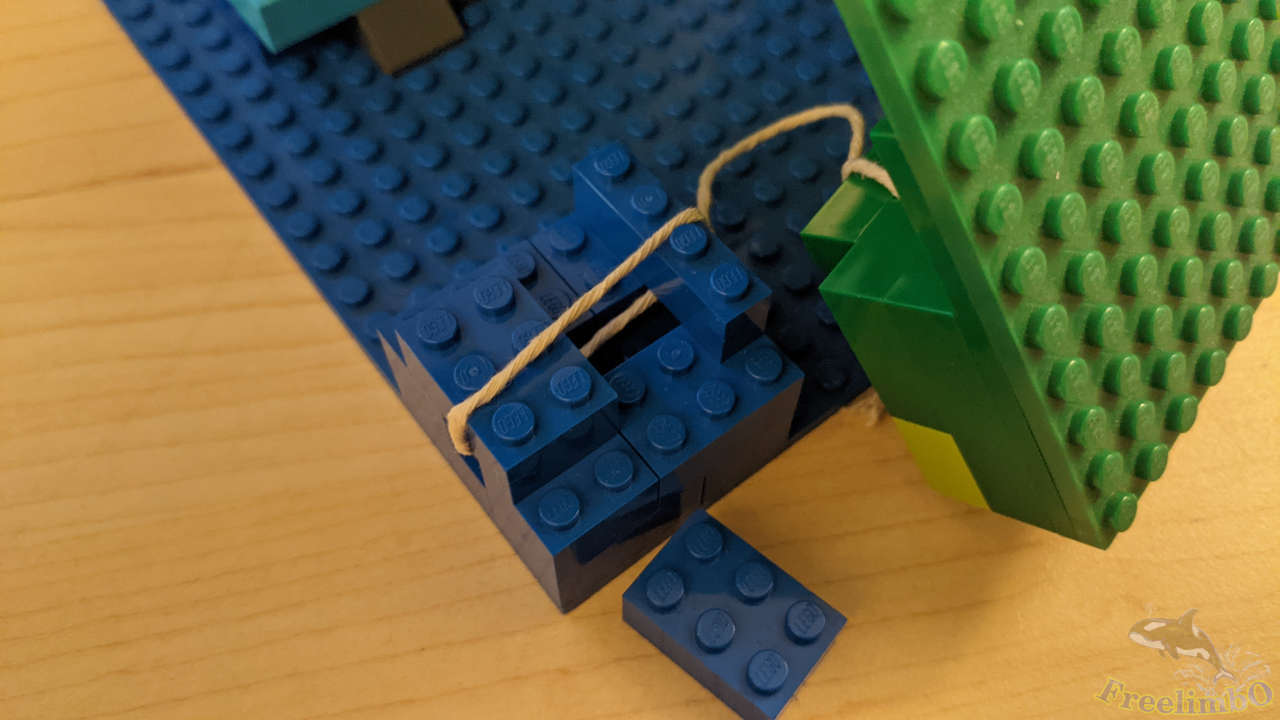
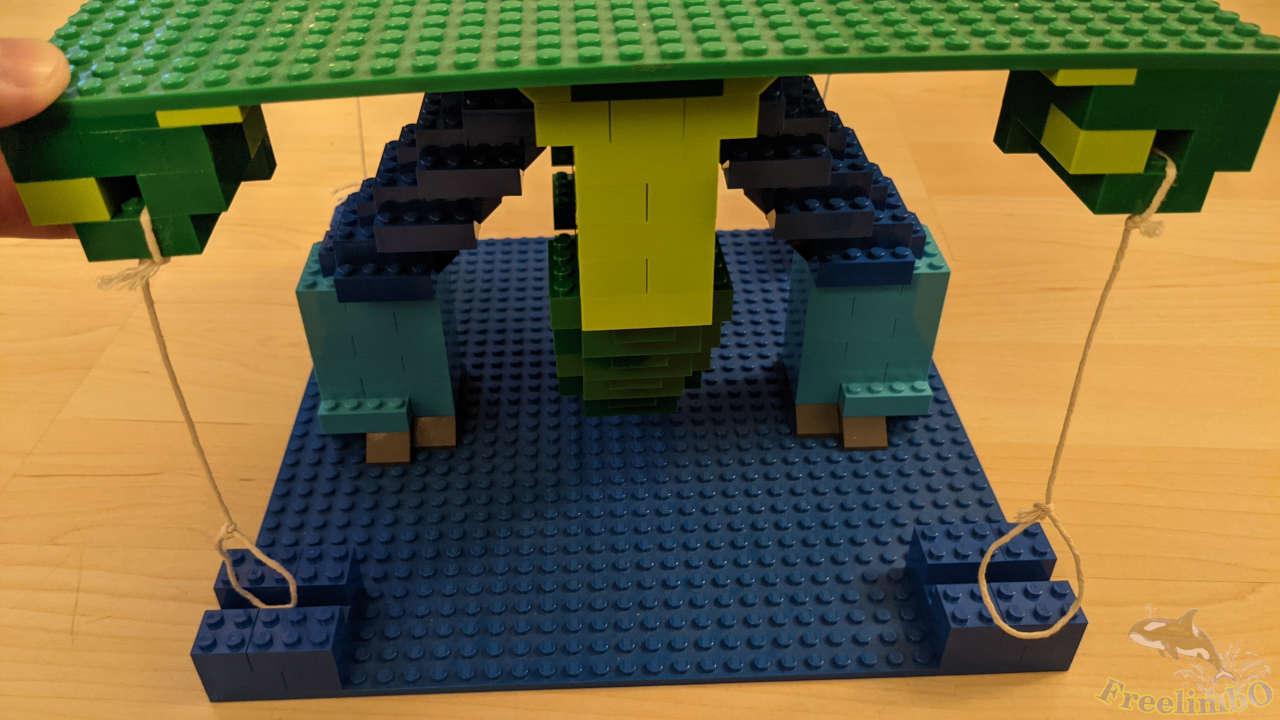
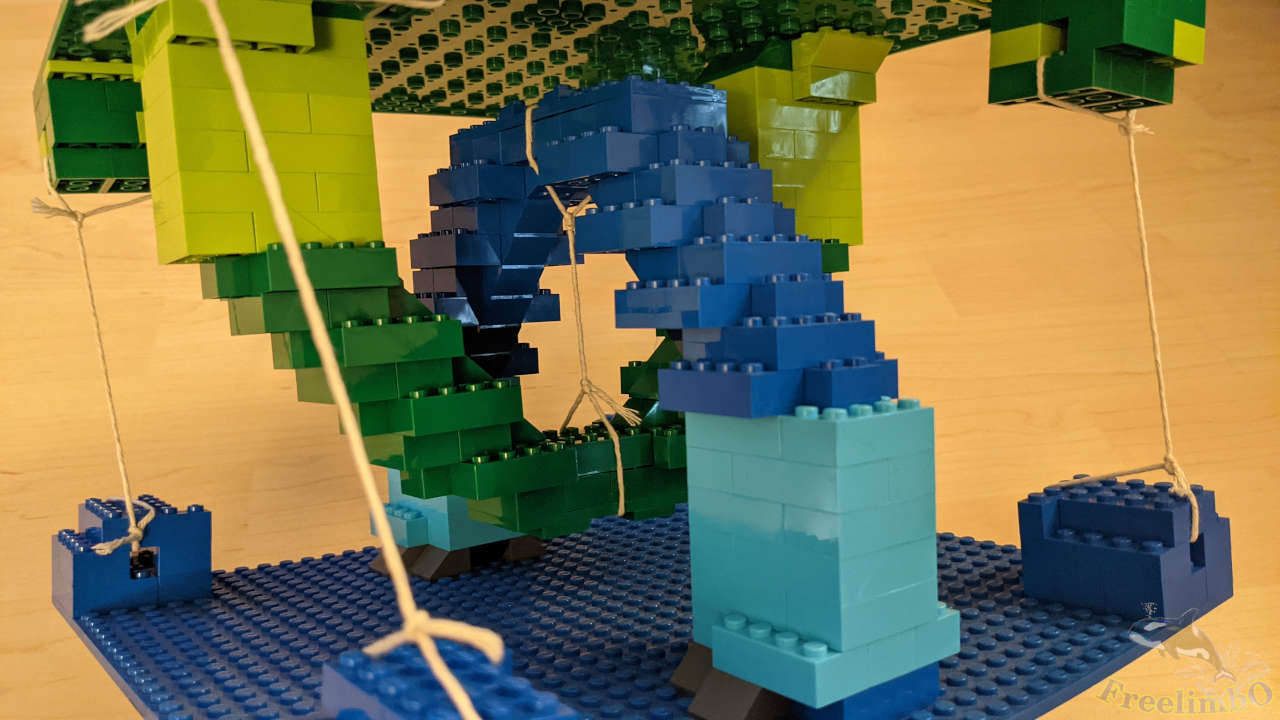 Let us take a close loook of the core structure of my anti-gravity table. Although there is no LEGO brick fixes the two arches together. the center string grabs them together and provides the tense to keep the two structures in a fixed distance without falling. The other four strings' task is to maintain the balance of the table just in case the upper structure slides to any direction.
That’s it.
Now we can put other awesome bricks onto the floating table. If we touch the green table, it will gracefully swing and then return to a balance.